Welcome to my Scrap Blog! I hope to share a glimpse into my life through my layouts and to contribute to the Digi-World with my freebies. Constructive Criticism is appreciated :)

Tuesday, August 31, 2010

Mask Overlay Tutorial

Hello Again! :) Yesterday I promised a mask tutorial and after playing around with masks some more I realized just how awesome masks really are. After some creative thinking I also learned that masks make overlays so super easy and totally flexible. If you have any questions or if this is hard to follow along just leave me a comment and I'll try to explain better. :)

1. Create a new document. My settings: 12 inch by 12 inch 300ppi
2. Open two papers, one for your main paper and another that will be used as an overlay. I've used papers from Gab's Art. You're also going to open up a BLACK, WHITE, AND GRAYSCALE overlay (if you're overlay isn't grayscale just go to Image > Adjustments > Desaturate. I'm using an overlay that I made. You can download it HERE to follow along to the tutorial.

3. Paste both papers and your overlay into your new file each in their own layer as shown below. (Image 3A)
4. Next we're going to click on the overlay layer and then go to the top and hit "Select" > "Select All". (You should see marching ants all over the place) Then jump over to "Edit" > "Copy" or "Ctrl+C". So now we've got all of this layer copied so now we can hit "Ctrl+D" to deselect and then delete that layer because we've got what we need from it.

5. Now we only have two layers, Top Layer and Main Paper. We're going to click onto the "Top Paper" layer and then hold the "Alt" key and click on the layer mask button at the bottom of the layers palatte. This opens a "Hide All" layer mask. (Image 5A)You'll see a "little black square" appear next to your "Top Layer" preview square in the layers palatte and your top paper will be hidden. (Image 5B)


6. Next, hold the "Alt" key and click that "little black square" that we just talked about. Your mask preview will show up and should be all black. Basically everything on your top layer is hidden, for now (Image 6A)


7. Now click "Ctrl+C" and paste that overlay into this layer. Don't worry guys we're almost there. (Image 6A the second lol)
8. Last but not least, hold the "Alt" key and again click that "little white square" to exit the mask preview mode and TA-DA! You're done! Smile and enjoy your awesome new paper!

Monday, August 30, 2010

My First Freebie

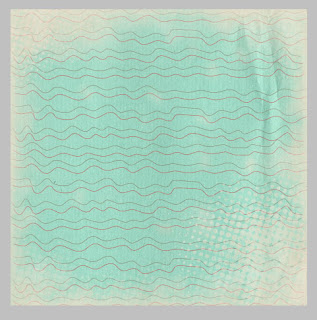
I apologize for taking so long to get something uploaded for you all. I was working on masks in Photoshop and thought I'd give it a shot at making my own photo mask. Surprising enough masks are so simple to work with. IDK why I never figured it out before :( So here for you today is a photomask for all of you with little guys in your lives. I'll try getting one done for you with little ladies :) I'm also going to be posting a tutorial on photomasks that's hopefully pretty simple. All the tutorials that I found were soo complicated and hard to understand. Please let me know what you think and any ideas of anything else you'd like to see.

Friday, August 27, 2010

Oldies but Goodies

I was flipping through the new Craft Crave DigiFree site (hey it's new to me I've been out of the Digi world for years) trying to figure out how to start submitting my freebies. Step 1: Check to see if your site is already listed. DOH Jessica, why didn't you think of that first. Since this is the same blogger account that I used way back in the day (like 2007) I figured I'd give it a shot and see if my site was still feeding. Well, whaddaya know? LOL my site is still being sent to DigiFree and on top of that I got to see a lot of my old freebies that I made 3 years ago. Kinda nostalgic :) So I've decided, when time permits, I'm gonna dig out my old desktop and start uploading my old freebies to share with all of you.

Thursday, August 26, 2010

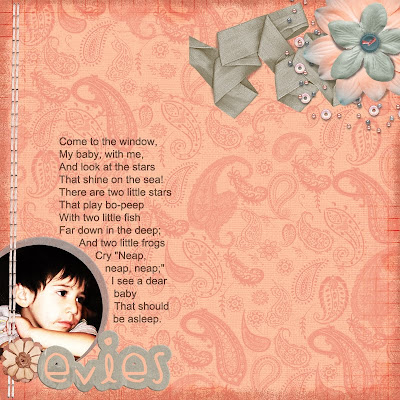
Dear Evies


My youngest son, Evan, just turned 3 yesterday and I'm a little saddened by it. My little baby is getting so big! My husband is currently out in the field for the week so we're planning him a lakeside party this weekend. This is just a snapshot that I took during his last days as a 2 year old. The kit that was used is from a Blog Train called Just Peachy.


Wednesday, August 25, 2010


Whew! I've been away from the Digi-scrappin' world for waaay too long and boy am I glad to be back. There's something about digiscrapping that just sets my mind at ease and I can't believe I stopped to begin with. What can I say... life got in the way. But here I am, back in action, ready to go forth and preserve life's precious memories now. Who needs a job when you can have hobbies right? :)

So "Where'd you go?", you ask (not that most of you would remember my site anyways, but for conversations sake....) I moved back to Texas from Germany where I was stationed with my husband. My husband deployed and I had to take on the role of the single working mother while he was gone. When what seemed like a never-ending deployment was finally over (and boy was I glad when it was) we moved yet again to Fort Hood here in Texas and I found a job here that... how can I say it politely..... kept me on my toes :) Right about the time I lost my grandmother and my mom was seriously ill I decided that the job I had was causing way too much stress on top of everything else that I had going on. So I quit! I know it sounds weird but it was a life changing decision. I got to be there for my Mom and my grandma on her last days. That's when I realized that my memories are my most precious possession and that I need to work harder to preserve those memories. So here I am and I couldn't be any happier to be back into it!